How to Mix your Indie Nail Polish – A Guide to Containers, Mixing Tools and their Pros and Cons
From a small test batch to a large 1 litre batch of nail polish it is vital that you know how to mix your nail polishes for consistent and stable results.
At first mixing nail polish seems like a very simple task. Just chuck all of your ingredients into any receptacle, stir and get going.
After making 1 or 2 nail polishes it becomes clear that it is not always that simple. There are so many different variables to consider it can become over whelming.
There are two main points for you to consider to help you mix the perfect nail polish every time.
1. The Containers that you will use to mix your polish in.
2. The Utensils and methods that you can use to mix your polish with.
We will look at both and consider their pros and cons.
Part 1 – Mixing Containers – The Options
What you mix your nail polish in can be the difference between success and a hot mess all over your counter top and the floor.
It is very tempting to use any cheap and clean container that is at hand but you really want to put a bit of thought into your containers.
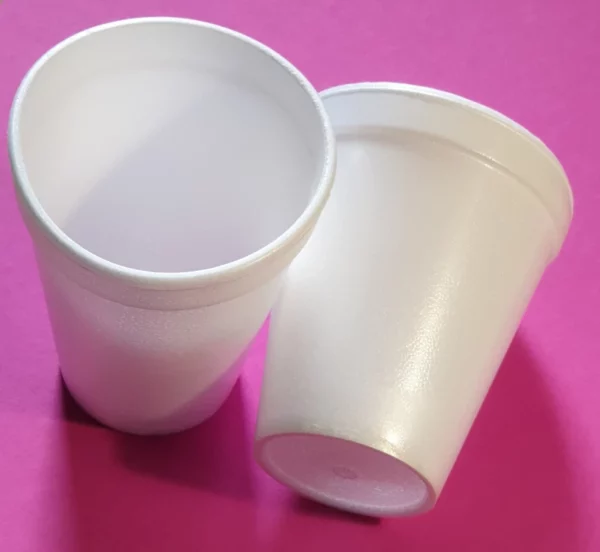
Polystyrene/foam cups
Pros (…in some parts of the world) – Although these were really cheap to buy and you could get them anywhere (not so easily now in the EU and UK for environmental reasons) they are a really big no no.
Cons – Polystyrene is not able to cope with the solvents in nail polish. Literally seconds after you put your liquid pigments or suspension base in the cup it will disintegrate.
So for those of you who can still get foam cups please do not use them for making your nail polish.
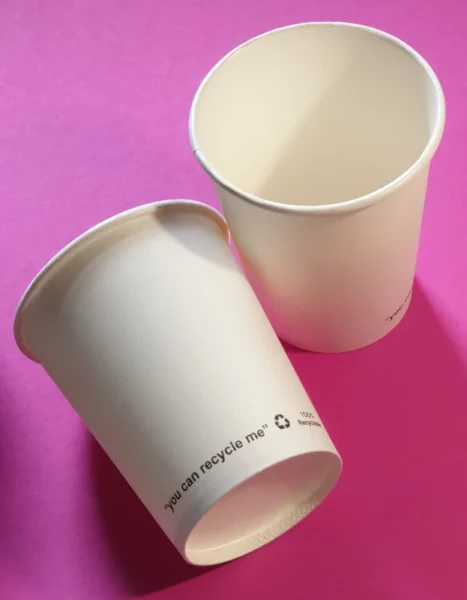
Paper Cups
Pros – Paper cups are cheap and readily available, even in the UK and EU. And once you are finished with them you can just throw them away.
Cons – Although paper cups will last a little bit longer than polystyrene the liquid nature of your nail polish ingredients will start to make the paper cup wet.
Once that happens the paper will start to disintegrate and fall apart. Even worse than that is even if it the cup doesn’t leak bits of paper may start to come off and will end up in your nail polish which is far from ideal.
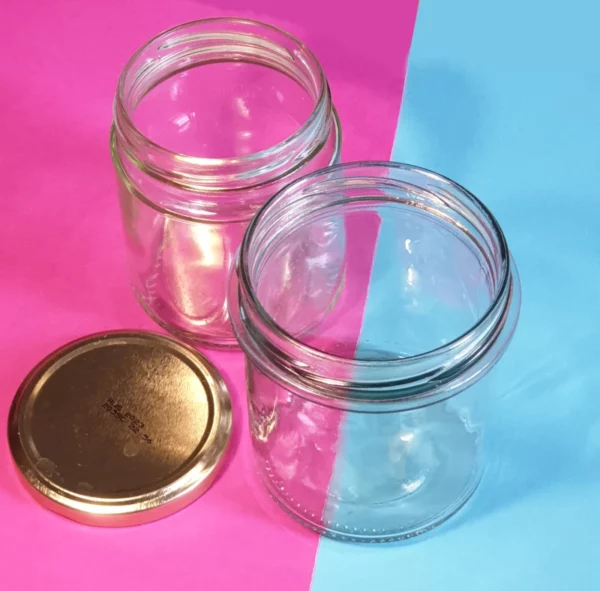
Glass Jars
Pros – Glass is a reasonable option for mixing your nail polish. After all nail polish is sold in glass bottles so it makes sense to mix your polish in it.
Glass will not react with your nail polish. It is usually transparent so you should be able to check if your nail polish is fully mixed just by checking the outside of the glass.
It can be a good option for indie polish makers as you can reuse glass jars and they cost nothing extra.
Please be aware that it is very difficult to get reused jars really clean and that is why they are not recommended for cosmetics such as creams.
However the nail polish environment is very harsh due to all of the solvents that are present so may kill lots of germs.
Glass can be cleaned with acetone or ethyl acetate but it can take some effort.
Cons– However glass breaks very easily. They can also be quite expensive especially if you just want to get going and you need a lot of containers.
Not completely sure about the glass jars but it might be an option especially if you sterilize them and get them really clean
Polypropylene PP
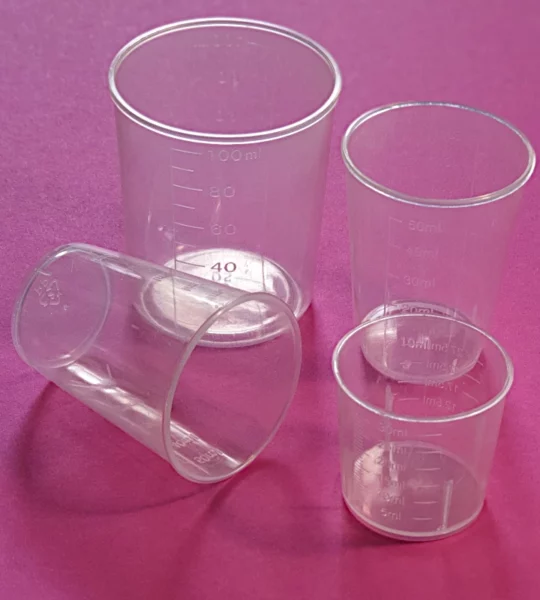
Polypropylene cups, especially measuring cups for medicine are a great alternative for mixing containers.
Pros – They are available in many sizes so you can make test batches or even 8 bottles of polish using them. They are durable and the PP will not react or disintegrate once it comes into contact with nail polish because it’s solvent resistant.
They can be cleaned with acetone, ethyl acetate or any other suitable solvent but it can be messy and it is best to do it when you have just finished making your polish otherwise dried nail polish can be harder to get out of your mixing cup.
Cons – They can take quite a lot of cleaning and you will need a fair amount of solvent available just for cleaning.
In my experience they are not quite as accurate as you would think. When I have measured my suspension base with a syringe an poured it into a measuring cup the amounts do not correspond.
I find that measuring cups generally measure less liquid than a syringe and this has lead to not making enough polish to fully fill all of my bottles. So I ignore the measurements on the side of the cups.
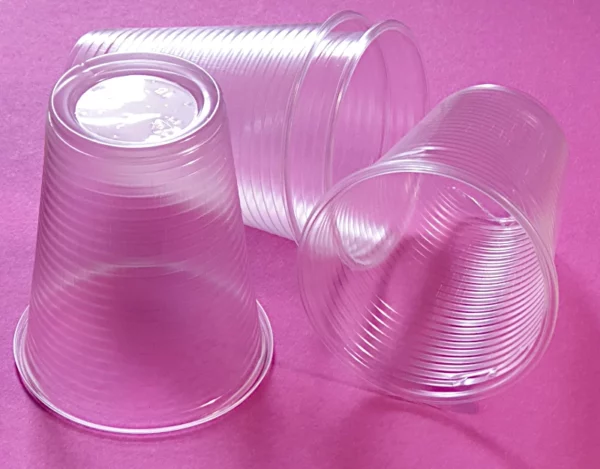
Plastic cups
Pros – You can also use disposable plastic cups if you can get hold of them and they are generally cheap.
Cons – But generally you will only use them once and you will need to keep buying new ones.
They also are usually quite flimsy and may break when you are mixing your polish.
Larger Containers
At some point in your nail polish making journey you will probably need to mix larger batches. Most of the time a 1 litre batch will be plenty for most indie polish makers.
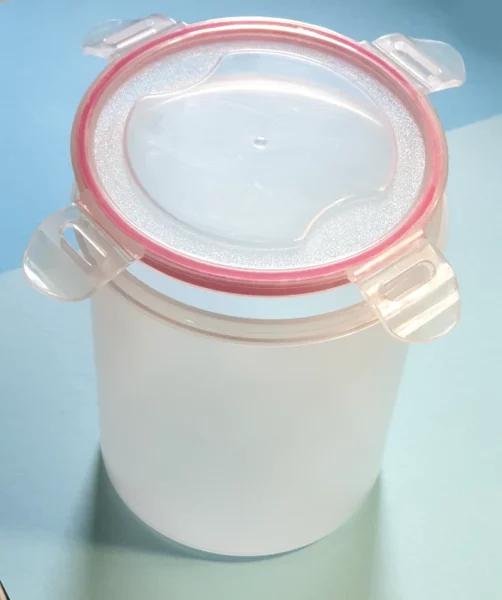
Pros – Airtight polypropylene containers are brilliant for mixing your nail polish in and you can even store your polish in them for a limited amount of time.
They are available in 1.4 litre capacities with lids that snap shut over the container which helps to reduce the amount of air and debris that will get to your polish.
The lids also helps to prevent spillages and reduce the likely hood of a spark or flame getting to your polish which we do not want. (Read below to find out more)
You will need to hold the container steady when your are mixing your polish so that it does not move.
If you decide the use a drill with a mixing tool attached then you will probably have to clamp the container securely to your work surface to prevent it from moving around.
Cons – Air will eventually get to your nail polish if you store it in one of these containers so it’s a good idea to transfer your nail polish to a bottle.
These containers do not have a pour spout so it is a challenge to pour directly from them into your nail polish bottles.
I find that drawing up the finished nail polish in a syringe and then squirting that into the bottle works best.
Part 2 – Mixing Utensils and Mixing Methods
Stir sticks –
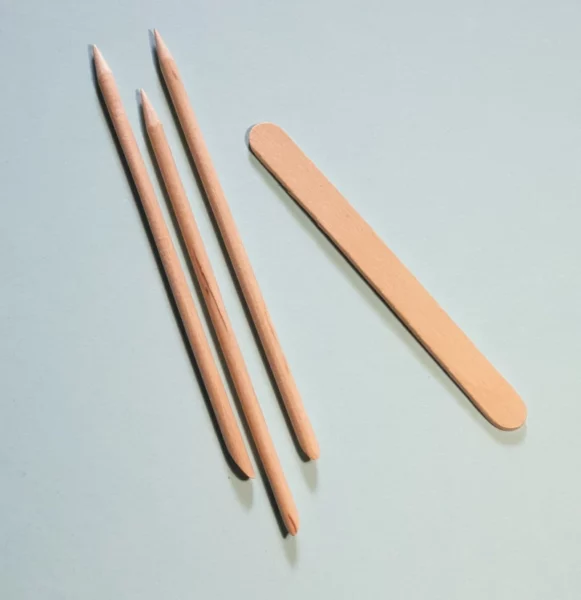
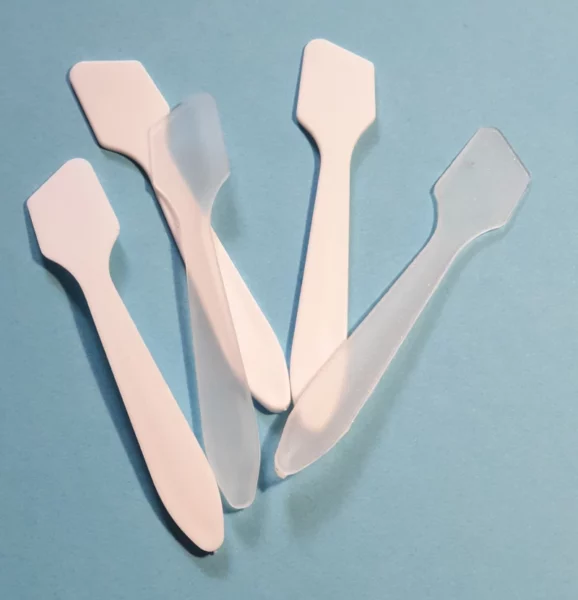
When you are making test batches or a few bottles of nail polish stir sticks are often good enough. They usually come as plastic (polypropylene) or wooden sticks.
Pros -Wooden sticks are widely available and easy to find. They are inexpensive making them a good option for when you are starting out.
Cons – However wooden sticks may disintegrate over time and the nail polish will start to eat away at the wood. This might leave small splinters in your nail polish which is not ideal
Polypropylene sticks are great because the don’t disintegrate at all and you can reuse them. Simply clean them with a suitable solvent and you are ready to go again.
Make sure to double check that they are made from PP.
Paint Mixers
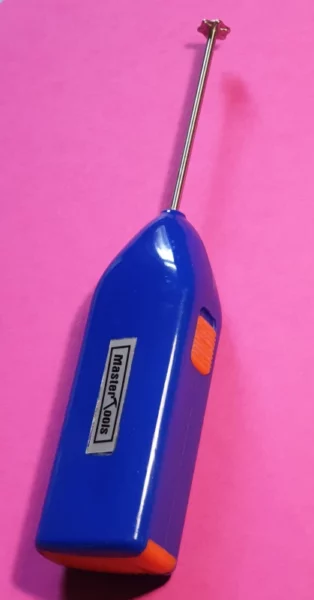
Small paint mixers have been around for a very long time. They are widely used by model makers who want to add a nice paint finish to their wooden or metal model cars or aeroplanes.
They are usually battery powered which means that they do not have a mains electrical energy source which can be hazardous.
Any sparks cause by head or electricity can be very dangerous when mixing nail polish. Nail polish contains nitrocellulose which is very volatile and can explode.
The solvents in nail polish are also very flammable so care must be taken to keep away from ignition sources including flames and sparks for safety reasons.
Pros – They are small enough for a 10ml mixing cup right up to much larger 100-200ml sizes so they are very versatile.
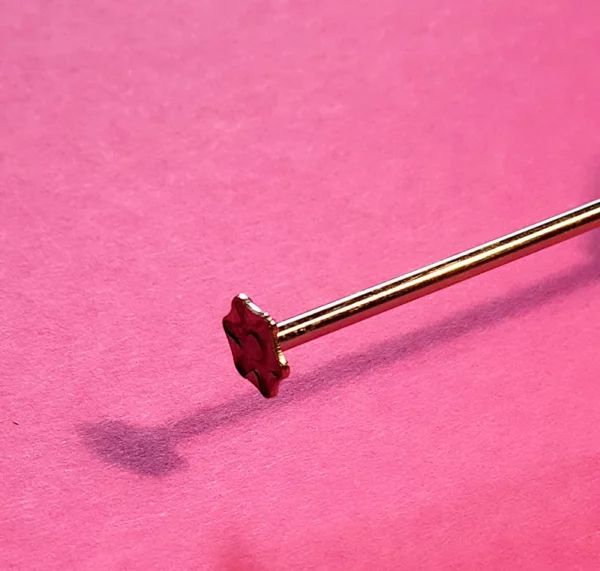
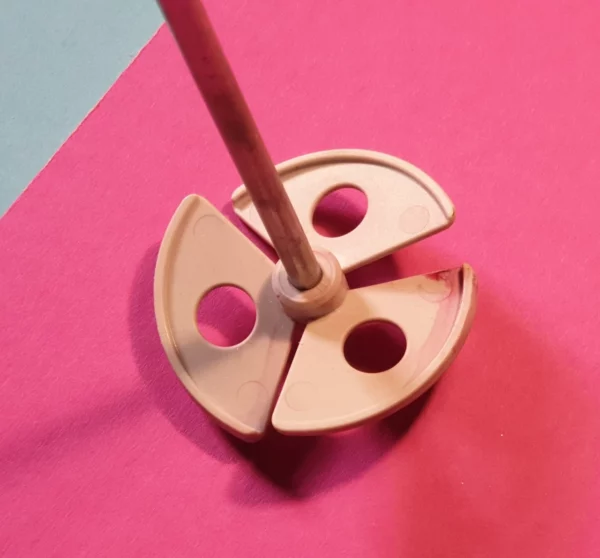
The mixing tool on the end of the mixer is very similar to a cowles blade. Cowles blades are ideal for mixing lacquers and nail polish with powder pigments.
The flat mixing blade helps to break down powders from clumps into smaller particles giving your nail polish a much smoother finish and avoiding pigments spotting.
Cons – While these paint mixers are fine for smaller batches you will need to upgrade when you move onto bigger batches.
The shaft of the mixing tool is not very long and wouldn’t reach the bottom of a deep container.
They are also battery powdered so have limited speed capabilities.
Dremel/ Rotary Tools
A dremel tool is a small rotary tool that comes with a variety of attachments. You can used it to sand small items, drill holes and it has cutting blades and shaping attachments.
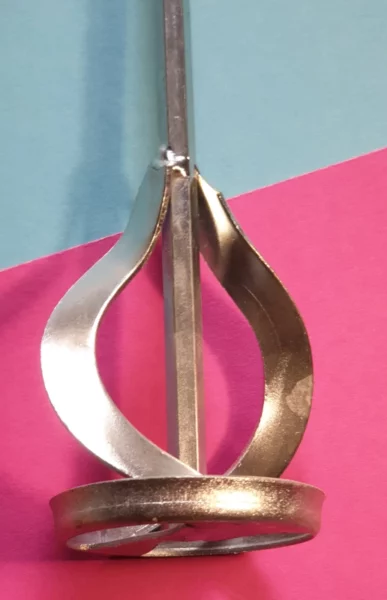
It also is more powerful that a battery paint mixer. Some indie polish makers use a rotary tool with the attachment from a badger paint mixer in order to mix larger batches or batches of glitter polish.
This is because glitter polishes tend to be made from thicker glitter suspension bases and glitter polishes might contain larger glitter particles which can be more of a challenge to mix.
Milkshake mixers
Milkshake mixers are another tool that are quite popular with indie polish makers. They can mix a reasonable amount of polish in one go – about 500ml which is perfect for larger batches.
Pros – They do not have a standard milk frother attachment which is like a whisk. What they actually have is a mixing blade that is essentially a double cowles blade, with one blade stacked on top of the other so you get double the mixing action.
Cowles blades are used in the industrial manufacture of paint making and cosmetic pigment dispersion. They are superior to standard paint mixing attachments because of the flatness of the blade.
When it rotates at high speed it “shears” the nail polish and the pigment clumps and actually breaks them up into smaller clumps and particles and disperses them.
With standard paint mixing attachments they just move the polish around but cannot actually break down pigment particles due to the large spaces within the blades.
Cons – Again you use this at your own risk. Milk shake mixers have an electrical power source and potentially could spark and ignite your flammable nail polish causing an explosion.
Drills
Pneumatic Drill
Pros – The best option is to use a pneumatic drill. It can be a challenge to generate the power needed to get the drill up to speed without a good air compressor, but at least then you are using air as your power source, which is not flammable and therefore it cannot spark.
Cons -Powerful air compressors are expensive so this would be a bit of an investment.
Electric Drills
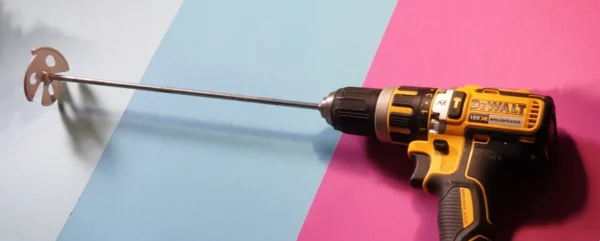
Now this is quite a controversial method. Why? Because of what I said earlier about safety. An electric drill, even if is running on a battery and is not plugged into a mains power supply will spark when it is first turned on.
The spark is brief and you may not see it but it’s the same as switching on a light switch. When you hit the switch there is a a brief spark.
That is why they say if you smell gas in your home do not switch on the lights because the spark from the switch might be just enough to ignite the free gas in the air and cause an explosion or fire.
Now I don’t want to be too melodramatic and many indie polish makers do use drills with paint paddle attachments to mix larger batches of nail polish.
So far I haven’t heard of any explosions or fires but I still want people to be aware that it is theoretically possible. I am not advocating that you use a drill.
This is entirely up to you and you will be responsible for what ever happens. But I can outline some steps you can take to minimise harm and protect yourself.
Many indie polish makers will use an insulated cordless drill because it adds a little more protection.
Do not use a drill that is plugged in. If it does catch fire at least there won’t be a cable and an electricity source attached to the drill to make matters much worse.
Cover your nail polish – large 1 litre containers are great. You can drill a hole in the top of the container and push your attachment through this and then attach it to the drill.
This creates a barrier between the exposed nail polish and the drill to help reduce chances of a spark reaching the nail polish.
Do not leave the drill unattended.
I know it can be tempting to go and get a much deserved coffee while you leave your mixer/drill to do its work but it only takes for your back to be turned for an instant, and then boom, disaster.
If you’re lucky disaster will be a bit of spilled nail polish but worse would be an explosion.
So please, if the drill is on, your freedom to wander is gone! DO NOT LEAVE THE DRILL UNATTENDED!!
Paint attachments for mixing
Now before we talk about the different types of blades that you can use to mix your nail polish this is a great time to talk about “shearing.”
What is shearing?
Shearing is the amount of stress that a mixing blade/attachment will place upon the liquids and pigments in your nail polish.
Different types of blades will produce different amounts of shearing depending on how they are designed which we will discuss in more details.
How does speed affect shearing?
If you use a lower speed setting there will be less shearing and less stress placed on your nail polish mixture. This is good if you do not want to destroy delicate pigments such as large micas, flakes, silica, borosilicate pigments.
The higher the speed then you will get more shearing which is ideal if you are mixing a nail polish with lots of lakes, oxides, ultramarines and other dry pigments that you have added.
Dry pigments (unless they have been manufactured in specialist conditions) tend to clump together and cause spotting in your final nail polishes which can be extremely frustrating.
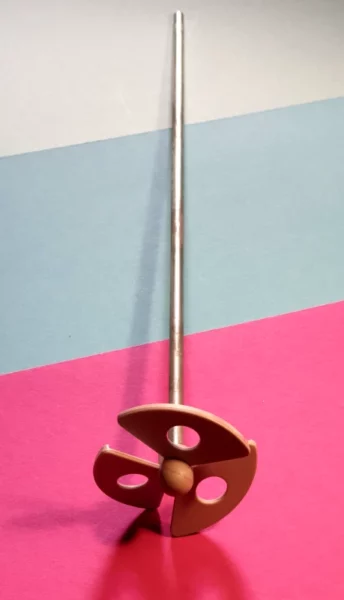
Propeller Blades
Propeller blades consist of a rotating shaft with usually 3 blades attached to the end of the shaft.
They can rotate at very high speeds of up to 8000 r.p.m and are ideal for mixing low viscosity liquids. This is why they are great for mixing your nail polish.
Propeller blades mix your nail polish homogeneously to make sure that all of your pigments are are evenly mixed and dispersed throughout your nail polish.
Propeller blades can be used a different speeds to create varying amounts of shearing.
Propeller blades are often used to mix pharmaceutical drugs. With pharmaceuticals you do not want to make the particles of medicine any smaller because they have been designed to be a specific size so that they contain a set amount of medicine.
Propeller blades should not reduce the size of particles. This is an advantage if you want to thoroughly mix your polish but you may not want to break down some of your pigments because they will lose their visual effects.
However I would avoid using this attachment for mixing fragile effects pigments such as UCC flakes or borosilicate flakes.
I always cringe when I see indie polish makers mixing their delicate and expensive flakes with high speed paint mixers.
It is often better just to stir certain fragile pigments into your polish instead of using any type of electrical paint mixer at all.
Helical Agitators/Mixers
These mixers look like a threaded screw and are easily found in hardware shops for mixing paints, mortars and cements. They are designed to be used at high speeds.
The corkscrew shape of the mixers and the large gaps between the blades make these mixing blades ideal for glitters polishes.
This because the thick glitter base and glitters can easily pass through the gaps in the mixer and avoid being damaged by the blades.
These blades place less stress on your liquid polish and your pigments which gives them a lower shearing capability.
This is great if you want to mix polish without damaging glitters and fragile particles.
However these blades are not ideal for mixing cremes or polishes with pigment powders where you need high shearing capabilities to help break down small lumps of dry pigment.
Cowles Blades
Cowles blades are used when you need to make sure that your pigments are well dispersed and any powder pigments are broken down into smaller particles.
Cowles blades are flat in shape and have teeth on the edges of the blade.
Because the blade is flat when it spins this large surface area can place significant stress or shear on your nail polish increasing the amount of dispersion. The teeth create even more shear which helps to break down lumps of pigment into smaller particles.
The cowles blade is ideal for mixing cremes and nail polishes where you have added dry powder pigments.
One of the biggest challenges that indie polish makers have is properly blending dry powders into their polish.
No matter how hard they try the final polish often will have some lumps and clumps of powder which ruin the nail polish. Using cowles blades will help you to reduce these lumps in your nail polish.
Disclaimer – Please note that Micamoma or its staff are not recommending or implying that you should use any of the methods described in the article to mix your nail polish. If you choose to do so you do it at your own risk and we cannot be held responsible for any damage or harm caused as a result.
